Hide and Seek – a Scratch and Makey Makey Construction

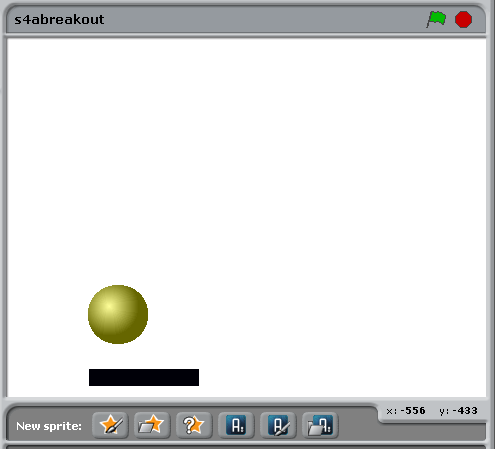
This one isn’t mine – it was done by a small group of Key Stage 3 (Junior High) girls during a one hour workshop I led earlier this year. This is one of my case studies with examples that we will be looking at in more detail at Scratch in Control. If you haven’t reserved your free place yet, do so now!

Computer Moderated Boardgames

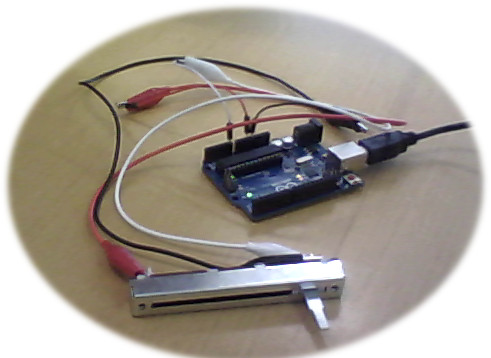
One of the things that students seem to ‘get’ very quickly is that a Makey Makey is really just a cleverly designed switch that you connect to your computer (OK, we all know it’s more complicated than that – but let’s keep things simple). Complete the circuit, and you close the switch. Whatever you’ve told the computer to do when that particular button is pressed, the computer will then do: make a noise, run through an animation, perform a calculation, move a sprite…

So, some people choose to become part of the switch by holding or attaching the earth to themselves. But there are other ways of completing the circuit…

Time for a 2B pencil and some copper conductive tape…

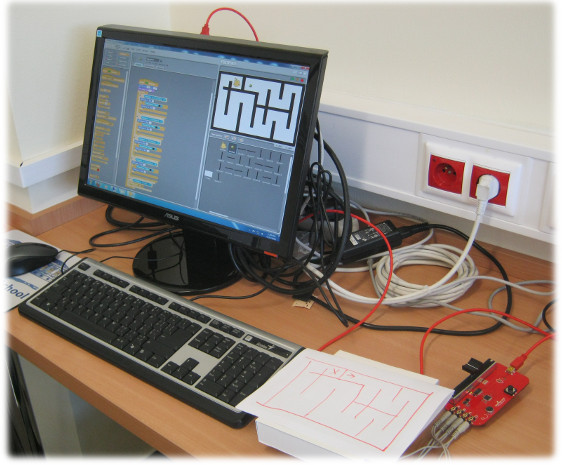
A thick dark graphite pencil trail will conduct electricity. So, we draw two halves of a circuit on some card and connect them to a Makey-Makey. If the lines are close enough, then using your finger to connect them will complete the circuit. For some applications, that’s enough.

But we can do better than that. Other items also conduct electricity – including some metal cans and foil wrapped candy (always worth having stuff like this handy to show off – just make sure you tested it beforehand). However, you can alse design your own buttons or playing pieces and stick a short length of copper conductive tape on the base.

As usual, this isn’t an original idea – I’m sure I read of a virtual zoo game on the Makey-Makey forums where a player who correctly places an animal in its enclosure is rewarded by a short animation.

My challenge to my students is: what kind of boardgame would you produce using Scratch and a Makey Makey?

There is a lot of scope here for what they may want the computer to do for them:

  • Ask random questions when a playing piece lands on a specific square
  • Tell you if an answer was right or wrong
  • Keep track of players’ scores, declaring who the winner is at the end
  • Play an animation/sound if a piece lands on a particular square
  • Keep information hidden that one person inputs, and that others have to discover

They come up with a game board design, cut holes in the card where they want the playing pieces to interact with Scratch, and then draw their circuit on a second sheet which fits under their game board. Design some 3D playing pieces and stick a length to conductive tape to each one’s base, clip the board to the Makey-Makey, write their Scratch code, and the game is ready!

For those teachers who already incorporate a ‘design an educational boardgame’ assignment to their classes, this activity offers an enhancement that may engage some students looking for a different type of challenge. The coding side of things can be as simple, or as complex as they choose to make it. At Scratch in Control, we’ll look at a simple modification that anyone can make to increase the number of possible responses on a game board…

Slide Potentiometers and Breakout Games

I like Arduinos – I tell my students that an arduino is a tiny ‘robot’ brain. Later on in the course I explaint to them that teachers lie all the time, because they can’t handle the truth…

Scratch for Arduino (S4A) is a variation of Scratch written to allow it to communicate directly with an Arduino board. Why would you want to do that? I hear you ask. Because you can tell Scratch to respond to a wider range of inputs than with a Picoboard or Makey-Makey. Plus, Scratch can then send instructions to servos, motors, LEDs and more to switch them on and off.

So, how long does it take to connect a slide potentiometer to S4A and write a simple Scratch Breakout game?

A slide potentiometer connected to an Arduino

It took me a few minutes to hook up a slide potentiomwter (cost – CZK37 – less than US$2) to an Arduino using some jumper wites and alligator clips I just happened to have lying about the place. The code took a couple of minutes – I wanted to do something reasonably straightforwards that a student could do using a little bit of trial and error.

Here’s the scripts.

The script for moving the paddle
The script for moving and bouncing the ball

And here’s a screenshot.

A screenshot of a very simple Breakout game – what would you do to improve it?

If you want to try this for yourself, and you’re free on May 18 in Prague – come and visit us at Scratch in Control


The Ghost Controller – for Virtual Mazes…

Many years ago I coined the phrase ‘conceptual magpie’. Some people would argue that I’m not the first to think this way – depending on which online source you believe, either Dali or Picasso apparently said “Good artists copy, great artists steal.”

Like so many other teachers, I trawl forums, twitter feeds, blogs and books in search of that elusive holy grail – inspiration. The other day, I saw something that caught my imagination @joshburker embedded a video from https://t.co/Jyle5Z2KHp and I knew I’d have to introduce the Robo-Sharks to this when we next met.

We’ve done outrageous user-interfaces before:

  • A Red Nose Day Joy Balloon
  • The Joy Can – a liquid-filled 3D tilt switch
  • Computer-Moderated Board Games
  • Bottle-top Buttons

Come to Scratch in Control – our free one day training course for teachers in Prague on Scratch Day, May 18 2013 – and you’ll see some of these (and much more) in action. But rather than use a Makey-Makey, I decided to do this one with a Picoboard – just for fun.


ghost maze controller
Here is the entire setup – the maze script running on the computer, the maze taped to the top of the ghost controller and a Picoboard peeking out from under it.

There are loads of ways we could have tackled this – one of the Robo-Sharks suggested we could have just taped a JoyCan to the bottom of the maze controller. That’s what I like to see – build on an existing solution. But not this time. I wanted something that would be reasonably easy for other teachers to replicate in class. And, as another student had already pointed out; letting kids loose with cans that are half-full of water in close proximity to computers is tempting fate a little…

So, just to be different, I decided to use four reed switches (they call them jazýčkový spínač – tongue switches – here in the Czech Republic). They switch on/off if they are in close proximity to a magnet. I taped each of them to the outside of a thin plastic container, and put a magnet – the type you use to attach things to fridge dooor and whieboards – to roll around inside it.

reed switches
Here is the underside of the controller, you can see the reed switched, taped to the plastic container, plus the magnet used to turn them on/off as the controller is tilted. The clips are connected to the Picoboard

This was then taped to the bottom of a spare thin card box I just happened to have lying around, and a copy of the maze I’d drawn in Scratch variant BYOB was taped onto the top. No expense spared here – Heath Robinson, Rube Goldberg, you aint seen nothing…

The most difficult part of the whole exercise was ensuring that a downwards left tilt corresponded to a left roll of the ball on the screen and so on…

It was fun, reasonably cheap (4 reed switches cost about the equivalent of US$4 here) – the components can be easily re-used/recycled and the coding can be as simple/difficult as you want.

To extend it – a classier endgame sequence would be a start, A timer, a score including penalties for hitting the edges. I’d favour an ‘augmented reality’ style of approach – taking a photo on the maze controller and perhaps shifting it slightly when the controller is tilted.

My students wanted to add monsters to avoid…

Personally, I’d go for a curriculum-related option instead. Navigate the maze to collect three numbers that add up to 100 or which are all factors of 108. Make your way to the exit while spelling out a key vocabulary term by rolling the ball over specific letters placed in strategic points in the maze.