Showing Off – with S4A

During our Gifted and Talented day, one of the project ideas proposed by a student was a no-touch game paddle using light sensors to detect when a hand is placed over one side of a controller, putting it in partial shade.

Of course, I like this idea so much, I’ve decided to steal it and build a prototype of my own.

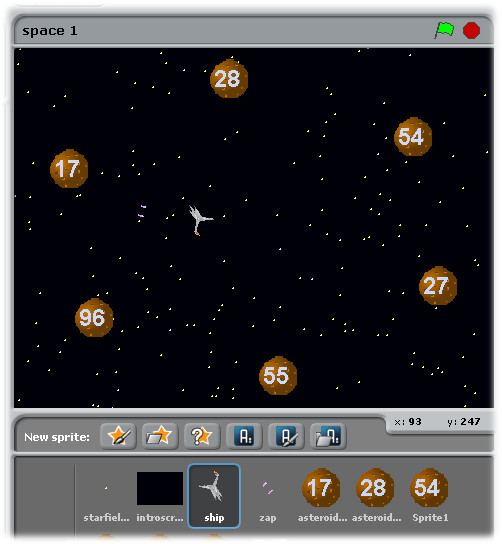
First of all, I needed a Scratch game in S4A that would suit this type of interface. So, I wrote one – a simple space game which included left and right thrusters as well as a missile to fire.

Screenshot of the finished game. The numbered asteroids move in an elliptical path while you fly around, wrapping if you exit the screen, trying to shoot the things

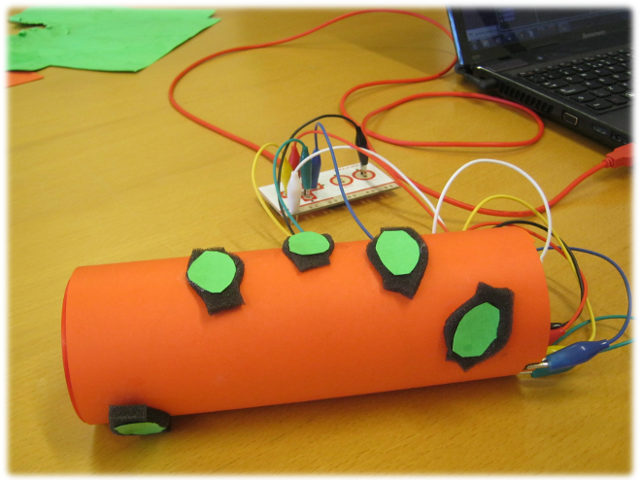
Next, I needed some components – one R/G LED and two light dependent resistors. Cost of parts: about the equivalent of US$2.

I also needed a design for the controller – I used Scratch to draw me a net

The net for my controller – all I needed to do was screenshot, crop and enlarge it before printing…

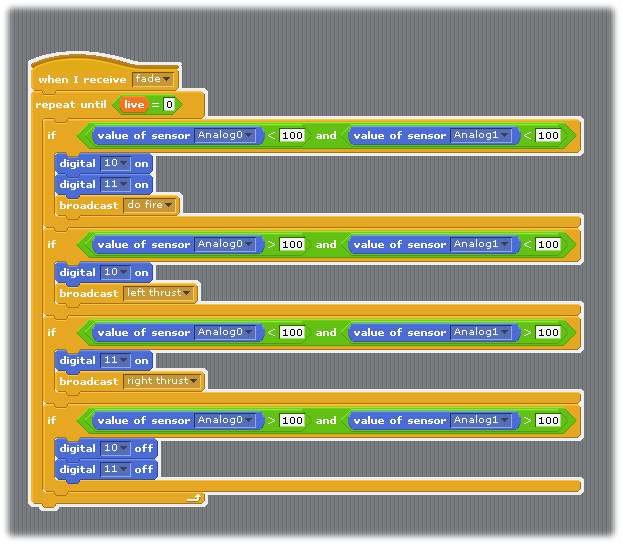
Having printed this out on card, all I had to do was cut it out, make some holes in it for the components to be inserted through and use some conductive tape to give me a base to solder them to some jumper wires. I then plugged these into an Arduino, added some blocks to enable the Arduino to communicate with the program

The analog inputs are for the two light sensors – the digital outputs are for the red and green components of the LED.

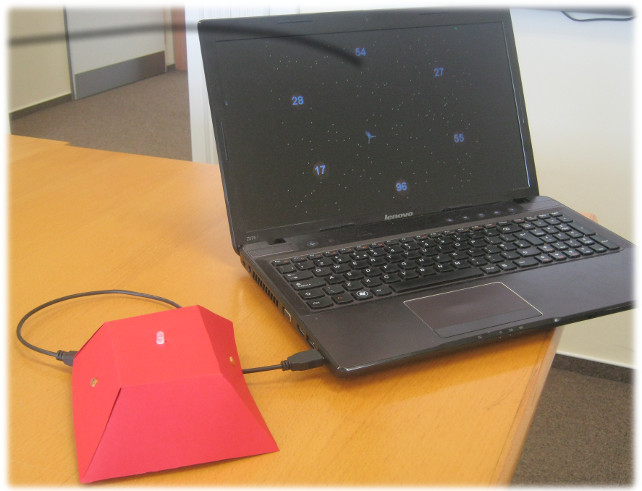
..and played the game.

You move your hand close to the left light sensor to switch on the left thrust motor – this rotates the ship to the right as it moves through space. If you do the same with the right, the right hand thruster rotates the ship anticlockwise. Put both in the shade, and the ship fires a purple pulse torpedo. To tell you what’s going on, an indicator light flashes red, green or yellow on top of the controller.

The controller connected to a laptop running the game in presentation mode…

Yes, it’s just another bizarre user interface – but far simpler to make than you might think. What sort of games would you make with it?

I’m planning to distribute more detailed instructions for this – and similar – construction projects for teachers who want to get their hands dirty at Scratch in Control. Obviously, this might not be the sort of task a beginner would choose to do – it involves a little bit of soldering for a start. But, if it’s something you’ve always wanted to try out in a safe and encouraging environment; and possibly win a prize – then come and join us in Prague on May 18.

A Control Cylinder – Because I Can!

Another Makey-Makey project in our series of outrageous user interfaces.

A control cylinder – powered by a makey-makey

This one arose from some discussion in the wake of the ghost controller. I have a student who is thinking about what sort of user-interface you could build for exploring a 3D environment with a Makey-Makey.

You can see where this is going – tune in next week for the washing-up glove of power,,,

One of the possibilities we discussed was having an object to grip – like a baton. This could incorporate a glove, but I decided to have a go with recycling some packaging foam and a cylindrical tube more commonly used for holding stackable cruchy potato-based snacks…

I’ve taken several shots of the process, so I will put them together as a slideshow later. But the photo aboves should give a reasonable idea of how it’s put together. First I drew an outline of my hand on card to position where the buttons for each finger should go.

On this card, I used a 2B pencil to draw the circuit for my buttons – testing each location with a piece of card which had conductive tape attached to it. I then took another card, slightly thinner – and cut out holes to eexpose only the button areas. On the surface of this, I added the foam packaging to raise the card/conductive tape top half of the button above the graphite part.

As a mechanism, the buttons work reasonably well when everything is in place.

The card layers were then stuck round the outside of the cylinder and clipped to the makey-makey. A simple Scratch script was used to test the device.

Refinements

I think a redesign of the graphite side of the buttons could improve the responsiveness of the cylinder. Also, the layout for the buttons is for a hand resting on the cylinder. Next time, I shall design for the hand to be gripped round the baton.

It would be possible to add extra features. This one used four fingers for up/down/left/right and the thumb to emulate a mouse click. It would also be possible to add a tilt switch mechanism for the device.