Multiplo

Multiplo was developed by teachers for teachers. I came across it via their kickstarter crowdfunding campaign and liked what I saw. The philosophy is simple enough, produce an integrated, but flexible model for a wide range classroom robotics projects which is accessible to a wide range of students through a visual programming environment.

It’s open source. To me, that’s a great plus, as it means that you can make additional custom parts if/when the need arises. To find copies of the documentation, construction guides and a helpful forum, you can visit the multiplo website.

The kit I ordered uses a custom, modified Arduino, with a power management module added to enable the motors to run from the same board with little extra power. In theory, you could use the mechanical parts with your own electronic components and an Arduino.

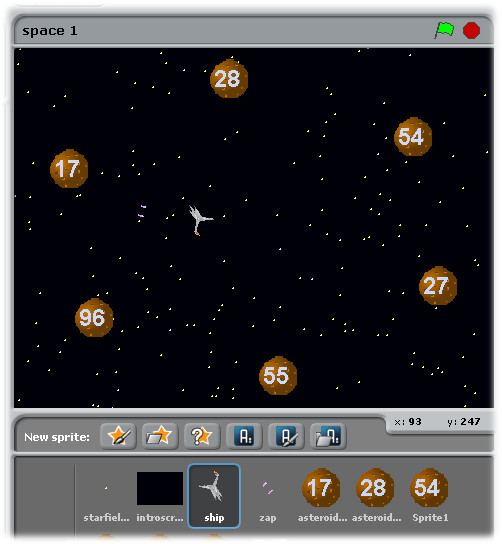
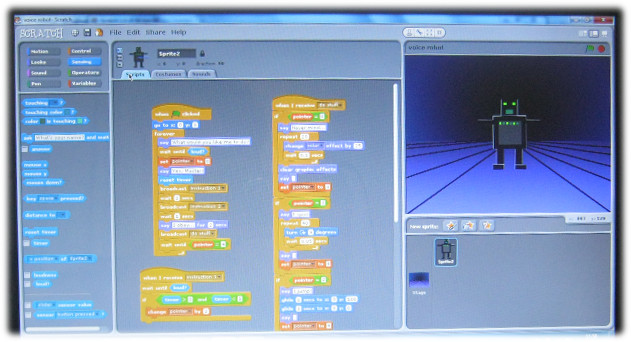
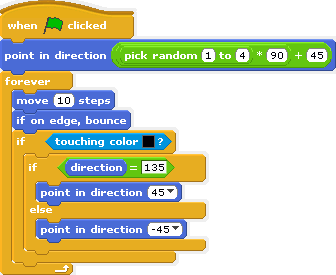
The kit also comes with Minibloq – a visual programming tool, similar in philosophy to Scratch, but with more of a learning curve. My robotics club started with the octagonal robot design, adapting it to support a papier mache shell; and wrote the code to create a photophobic penguin.

The robot waddled about, moving away from lit areas, seeking somewhere dark to hide. Putting it in  the school library, it moved into the computer lab, where we had switched the lights off, and sought refuge in the shadows under the table there…

I shall post video and photos later…


Makeblock

So, my Makeblock kit arrived, I collected it from my local post office on the day after my birthday. I downloaded the list of parts and the Arduino libraries from the Makeblock website and tested it. The next day, I built a simple robot in under half an hour.

So, what is Makeblock?

It’s an open source hardware platform for robotics. It also has a custom shield for easily adding sensors, motors and other devices to it. In theory, it should also integrate with Lego. I’ll let you know how that works out later.

I obtained mine through Makeblock’s kickstarter project. There are a few European suppliers who will stock different sets, or, in theory, you could download the plans and make your own.

The hardware is aluminium (that’s aluminum for our American readers), with a cleverly thought out system of holes and grooves to hold things securely in place.

The kit I received also includes two motors and an IR sensor with a remote control (you can see where this is going). In addition to that, there were also an Arduino and a custom shield with colour-coded sockets for different devices to be connected via RJ11 cables.

The libraries come with sample code, so it’s easy enough to adapt them to make your own custom sketches. Plugging the Arduino with its custom shield in to S4A to make a Scratch-based tethered robot would require significant additional work – . However, as a basis for construction projects using your own kit, it has potential.

Makeblock and Multiplo: Head to Head

Earlier in the school year, I came across two exciting kickstarter projects.

If you’ve never come across crowdfunding before, it’s well worth browsing through both kickstarter and indiegogo to get a feel for the range of projects and the level of enthusiasm of both the starters and backers. I’ll do a separate post on the topic of crowdfunding later.

Both the projects offered a low-cost, affordable route into Arduino-based robotics development that teachers might want to investigate. What grabbed my attention however, was that both projects were also open source. In other words, if you find you’re short of a part, you can download the plans and quickly fabricate a replacement. No need to worry about license fees or buying a much larger expansion kit. If you need to, you can modify the original file and print/burn your own custom parts; share your ideas over the internet and not worry about an angry solicitor’s letter dropping through your letterbox.

That, to me is far more revolutionary than designing a gun.

The two products were Multiplo and Makeblock. Each one deserves a post in its own right. Both have their fair share of advantages and disadvantages.

I’ll have a set of each out on display for teachers to play with at Scratch in Control on May 18. If you’re looking for a cheaper alternative to Lego as a robotics platform that integrates with Arduino, come along and experiment!

Showing Off – with S4A

During our Gifted and Talented day, one of the project ideas proposed by a student was a no-touch game paddle using light sensors to detect when a hand is placed over one side of a controller, putting it in partial shade.

Of course, I like this idea so much, I’ve decided to steal it and build a prototype of my own.

First of all, I needed a Scratch game in S4A that would suit this type of interface. So, I wrote one – a simple space game which included left and right thrusters as well as a missile to fire.

Screenshot of the finished game. The numbered asteroids move in an elliptical path while you fly around, wrapping if you exit the screen, trying to shoot the things

Next, I needed some components – one R/G LED and two light dependent resistors. Cost of parts: about the equivalent of US$2.

I also needed a design for the controller – I used Scratch to draw me a net

The net for my controller – all I needed to do was screenshot, crop and enlarge it before printing…

Having printed this out on card, all I had to do was cut it out, make some holes in it for the components to be inserted through and use some conductive tape to give me a base to solder them to some jumper wires. I then plugged these into an Arduino, added some blocks to enable the Arduino to communicate with the program

The analog inputs are for the two light sensors – the digital outputs are for the red and green components of the LED.

..and played the game.

You move your hand close to the left light sensor to switch on the left thrust motor – this rotates the ship to the right as it moves through space. If you do the same with the right, the right hand thruster rotates the ship anticlockwise. Put both in the shade, and the ship fires a purple pulse torpedo. To tell you what’s going on, an indicator light flashes red, green or yellow on top of the controller.

The controller connected to a laptop running the game in presentation mode…

Yes, it’s just another bizarre user interface – but far simpler to make than you might think. What sort of games would you make with it?

I’m planning to distribute more detailed instructions for this – and similar – construction projects for teachers who want to get their hands dirty at Scratch in Control. Obviously, this might not be the sort of task a beginner would choose to do – it involves a little bit of soldering for a start. But, if it’s something you’ve always wanted to try out in a safe and encouraging environment; and possibly win a prize – then come and join us in Prague on May 18.

The One Hour Scratch Robot Challenge

One of the topics we’ll be doing a short case study on at Scratch in Control is the place of coding as a problem solving tool in Gifted and Talented provision. To summarise the approach we’ve used successfully: where appropriate, allow for a coded option to stretch G/T students. If you want to know more, either join us at our Scratch Day event in Prague, or buy us lunch

Today, we’ve had a G/T curriculum enrichment day for Junior High (KS3) students. Many of them already have some Scratch experience, but not so much familiarity with control technology. With only an hour, projects needed to be simple I decided that the best approach would be to offer three differentiated challenges.

Level 1: His Master’s Voice

I showed the group a script for a voice activated robot on the screen, by varying the loudness and timing of my commands, it (usually) performed as expected, spinning, jumping and dancing when ordered to. We discussed possible improvements and refinements that they could make if they were to take on this challenge.


Screenshot of a voice activated robot that responds to different commands (most of the time)

Level 2: Make Yourself a Cyborg

I then showed the group my simple Robot of Truth controller, connected to a Makey-Makey. We discussed different user-interfaces that they could draw with a 2B pencil. Some of them had existing projects that they wanted to enhance by making their own custom controllers.

The 2B pencil skeleton of the Robot of Truth – clips attach to the bottom (middle clip is GND/earth). When you touch the left/right hands, it completes the circuit for true/false questions. A Light Louse looks on, bemused by it all…

Level 3: Activate Skynet!

A Makey-Makey will let you easily make almost anything into a button for Scratch, but if you want more options involving both input and output , S4A with an Arduino make a great combination. I set up a simple breadboarded circuit including a light sensor and a DC motor; showing how just a few blocks of code would enable you to use the LDR as a simple proximity sensor to set off the motor. We discussed some possible projects, and I had a couple of students prototyping a contactless game controller and a Rube Goldberg burglar alarm.

An Arduino connected to a light sensor (via a resistor) and a DC motor (via a transistor). When the light sensor is put into shade, the motor starts…

In short, it was a very fruitful afternoon spent with two groups of creative and enthusiastic students.


Slide Potentiometers and Breakout Games

I like Arduinos – I tell my students that an arduino is a tiny ‘robot’ brain. Later on in the course I explaint to them that teachers lie all the time, because they can’t handle the truth…

Scratch for Arduino (S4A) is a variation of Scratch written to allow it to communicate directly with an Arduino board. Why would you want to do that? I hear you ask. Because you can tell Scratch to respond to a wider range of inputs than with a Picoboard or Makey-Makey. Plus, Scratch can then send instructions to servos, motors, LEDs and more to switch them on and off.

So, how long does it take to connect a slide potentiometer to S4A and write a simple Scratch Breakout game?

A slide potentiometer connected to an Arduino

It took me a few minutes to hook up a slide potentiomwter (cost – CZK37 – less than US$2) to an Arduino using some jumper wites and alligator clips I just happened to have lying about the place. The code took a couple of minutes – I wanted to do something reasonably straightforwards that a student could do using a little bit of trial and error.

Here’s the scripts.

The script for moving the paddle
The script for moving and bouncing the ball

And here’s a screenshot.

A screenshot of a very simple Breakout game – what would you do to improve it?

If you want to try this for yourself, and you’re free on May 18 in Prague – come and visit us at Scratch in Control