What Not To Do…

It’s human nature, as old as the Bible (see 1 Kings ch.18 for an example). When faced with totalitarian despotism, we respond with a joke. We ridicule what we fear. Michael Gove (UK Secretary of State for Education) fears that history courses could be dumbed down if teachers focus on empathy rather than facts, so he pokes fun at one attempt to encourage students to re-write the story of Hitler’s rise to power for a much younger audience. Those who fear that an overemphasis on history as a factual narrative leaves little time for analysis in turn lampoon Michael Gove as a Roger Hargreaves character. Needless to say, Russel Tarr’s response is much more measured and well thought out. I decided to wait until reading his reply before posting my contribuition to the debate…

Like Michael Gove, I too am no expert on the Mr Men and the Little Misses – although my daughter once created her own hilarious Scratch homage to the Mr Rude “Pull mah fingeurrr” interactivity that used to reside on Channel 5’s Milkshake pages. However, his concerns strike a chord with one activity I do in class which leans heavily on popular culture, for which I would publicly like to apologise in advance to the wider educational community, just in case Mr Gove learns about it…

What follows isn’t a new illustration. I even shared it with the teachers at the Google Apps for Education Summit in Dubai earlier this year to make a point.

There is one thing I have noticed over the years. Many students cannot draw using a computer. There are two main reasons for this:

  1. There’s a steep learning curve – or as one student put it, after a month of working with Inkscape. “All those lessons, and I can now produce something that looks like a three-year-old drew it!” With limited time available, and with the ever-present need to produce instant, high-quality results, it’s no surprise that precious curriculum time isn’t usually devoted to vector graphics applications.
  2. Instead, we turn to the range of excellent image search tools created by Google, and hopefully find time to teach the students about derivative works, attribution of sources, Creative Commons licensing and fair use.

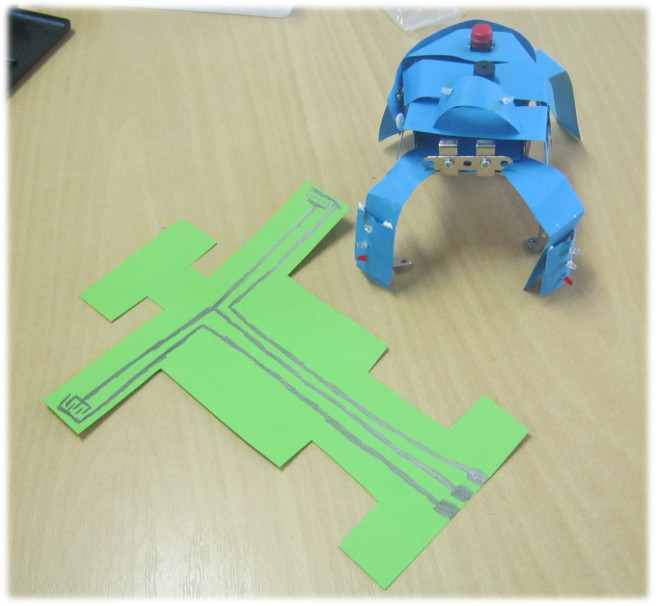
But this isn’t the only way to get hold of a digital image. Often, when I want cartoon-style images of people for work in Scratch, I’ll use a South Park style avatar generator. There are plenty around. I usually use www.sp-studio.de for mine. As there’s always potential for cyberbullying if you give students a completely free choice of subject, I usually choose a theme for my students to investigate. If you would like to see my example Oliver! or Wizard of Oz sprite collections, I’m happy to share. So, I’ve seen my fair share of totalitarian dictators reduced to a two-dimensional cartoonification.

When introducing game design as a coding task in Scratch, one thing I warn other teachers about is the temptation to say to a class, “Just produce an educational game to show me what you’ve learned,” with little or no guidance. When I do this unit with my Year 8 students, we document our research and justify our choices long before we even start to think about coding. I have even gone so far to upload this version of what not to do that I share with teachers:

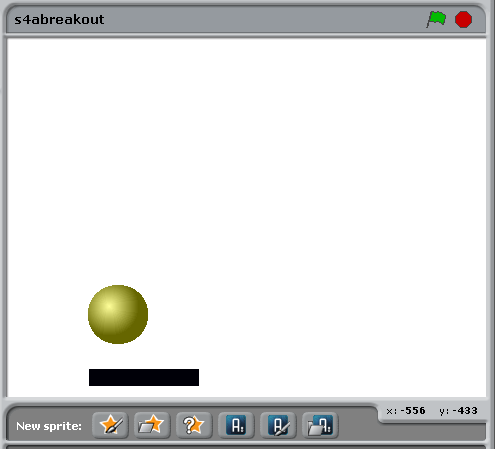
Ra-Ra-Rasputin – the game!

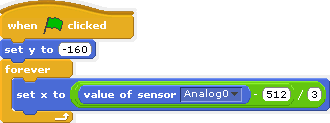
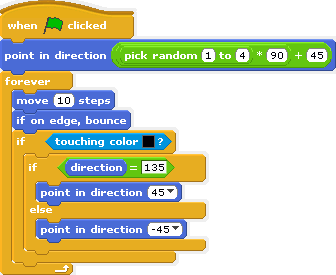
Yes, you have to use the arrow keys to move Tsar Nic around the stage while he is followed by the mad monk himself. If Rasputin touches Nic – the game’s up and Nic dies. If Nic can get Rasputin to move over the bullet, bomb and poison, then Nic wins.

You can see where this is going. Any time now, I expect an announcement along the lines of, “And so-called Computer Science teachers also ride roughshod over the History curriculum in their feeble attempts to make their subject appear ‘with it’. Why only yesterday, I was shown an example of an interactive cartoon version of the story of Rasputin in the style of South Park that bears little resemblence to the actual facts.”

If that does happen, remember, you read it here first. It’s my parody of a parody.

Now, obviously, if you want to learn more about the way I actually teach my educational game authoring unit, there’s still time to register for Scratch in Control in Prague on May 18.

Makeblock and Multiplo: Head to Head

Earlier in the school year, I came across two exciting kickstarter projects.

If you’ve never come across crowdfunding before, it’s well worth browsing through both kickstarter and indiegogo to get a feel for the range of projects and the level of enthusiasm of both the starters and backers. I’ll do a separate post on the topic of crowdfunding later.

Both the projects offered a low-cost, affordable route into Arduino-based robotics development that teachers might want to investigate. What grabbed my attention however, was that both projects were also open source. In other words, if you find you’re short of a part, you can download the plans and quickly fabricate a replacement. No need to worry about license fees or buying a much larger expansion kit. If you need to, you can modify the original file and print/burn your own custom parts; share your ideas over the internet and not worry about an angry solicitor’s letter dropping through your letterbox.

That, to me is far more revolutionary than designing a gun.

The two products were Multiplo and Makeblock. Each one deserves a post in its own right. Both have their fair share of advantages and disadvantages.

I’ll have a set of each out on display for teachers to play with at Scratch in Control on May 18. If you’re looking for a cheaper alternative to Lego as a robotics platform that integrates with Arduino, come along and experiment!

Scratch 2.0 is Out!

Yes, Scratch 2.0 is finally out.

Here’s a few experiments of mine with recursive blocks

We will be using Scratch 2.0 during Scratch in Control.

Food

Thinking of candy bands and tortillaphones has made me hungry.

As far as the catering is concerned for Scratch in Control, I’m planning on serving wraps and puff-pastry parcels, along with a few other savoury nibbles and salad to garnish. We’ll make sure there’s a vegetarian option available (not just a few hunks of bread and cheese with a lettuce leaf – more likely a vegetable korma wrap). If there’s a sudden surge in demand for tickets, we’ll also supply clebichek (Czech open sandwiches) and pizza.

Obviously, I don’t expect someone to be looking at this and saying, “Wow, curry in a wrap, I must get my free ticket now!” But the catering for any event, no matter how big or small shouldn’t be an afterthought.

And remember, if you can’t make it; but would like copies of our resources. Why not offer to pay for our lunch via our Indiegogo campaign…

Hide and Seek – a Scratch and Makey Makey Construction

This one isn’t mine – it was done by a small group of Key Stage 3 (Junior High) girls during a one hour workshop I led earlier this year. This is one of my case studies with examples that we will be looking at in more detail at Scratch in Control. If you haven’t reserved your free place yet, do so now!

Computer Moderated Boardgames

One of the things that students seem to ‘get’ very quickly is that a Makey Makey is really just a cleverly designed switch that you connect to your computer (OK, we all know it’s more complicated than that – but let’s keep things simple). Complete the circuit, and you close the switch. Whatever you’ve told the computer to do when that particular button is pressed, the computer will then do: make a noise, run through an animation, perform a calculation, move a sprite…

So, some people choose to become part of the switch by holding or attaching the earth to themselves. But there are other ways of completing the circuit…

Time for a 2B pencil and some copper conductive tape…

A thick dark graphite pencil trail will conduct electricity. So, we draw two halves of a circuit on some card and connect them to a Makey-Makey. If the lines are close enough, then using your finger to connect them will complete the circuit. For some applications, that’s enough.

But we can do better than that. Other items also conduct electricity – including some metal cans and foil wrapped candy (always worth having stuff like this handy to show off – just make sure you tested it beforehand). However, you can alse design your own buttons or playing pieces and stick a short length of copper conductive tape on the base.

As usual, this isn’t an original idea – I’m sure I read of a virtual zoo game on the Makey-Makey forums where a player who correctly places an animal in its enclosure is rewarded by a short animation.

My challenge to my students is: what kind of boardgame would you produce using Scratch and a Makey Makey?

There is a lot of scope here for what they may want the computer to do for them:

  • Ask random questions when a playing piece lands on a specific square
  • Tell you if an answer was right or wrong
  • Keep track of players’ scores, declaring who the winner is at the end
  • Play an animation/sound if a piece lands on a particular square
  • Keep information hidden that one person inputs, and that others have to discover

They come up with a game board design, cut holes in the card where they want the playing pieces to interact with Scratch, and then draw their circuit on a second sheet which fits under their game board. Design some 3D playing pieces and stick a length to conductive tape to each one’s base, clip the board to the Makey-Makey, write their Scratch code, and the game is ready!

For those teachers who already incorporate a ‘design an educational boardgame’ assignment to their classes, this activity offers an enhancement that may engage some students looking for a different type of challenge. The coding side of things can be as simple, or as complex as they choose to make it. At Scratch in Control, we’ll look at a simple modification that anyone can make to increase the number of possible responses on a game board…

Food for Thought…

You’ve heard your parents say, “Don’t play with your food!” If you’re a parent, you’ve probably said it yourself, even if you vowed a million times that you would never turn into a carbon-copy of your parents…

The Makey-Makey changes all of that. Most food is conductive – so what you eat, can become a button to click…

One of my GCT colleagues recently released this short instructional video on the art of making marshmallows talk.

I had to respond by releasing this footage shot earlier this year:

and

enjoy…

Those of you who want to see a performing candy band in action – come to Scratch in Control

Showing Off – with S4A

During our Gifted and Talented day, one of the project ideas proposed by a student was a no-touch game paddle using light sensors to detect when a hand is placed over one side of a controller, putting it in partial shade.

Of course, I like this idea so much, I’ve decided to steal it and build a prototype of my own.

First of all, I needed a Scratch game in S4A that would suit this type of interface. So, I wrote one – a simple space game which included left and right thrusters as well as a missile to fire.

Screenshot of the finished game. The numbered asteroids move in an elliptical path while you fly around, wrapping if you exit the screen, trying to shoot the things

Next, I needed some components – one R/G LED and two light dependent resistors. Cost of parts: about the equivalent of US$2.

I also needed a design for the controller – I used Scratch to draw me a net

The net for my controller – all I needed to do was screenshot, crop and enlarge it before printing…

Having printed this out on card, all I had to do was cut it out, make some holes in it for the components to be inserted through and use some conductive tape to give me a base to solder them to some jumper wires. I then plugged these into an Arduino, added some blocks to enable the Arduino to communicate with the program

The analog inputs are for the two light sensors – the digital outputs are for the red and green components of the LED.

..and played the game.

You move your hand close to the left light sensor to switch on the left thrust motor – this rotates the ship to the right as it moves through space. If you do the same with the right, the right hand thruster rotates the ship anticlockwise. Put both in the shade, and the ship fires a purple pulse torpedo. To tell you what’s going on, an indicator light flashes red, green or yellow on top of the controller.

The controller connected to a laptop running the game in presentation mode…

Yes, it’s just another bizarre user interface – but far simpler to make than you might think. What sort of games would you make with it?

I’m planning to distribute more detailed instructions for this – and similar – construction projects for teachers who want to get their hands dirty at Scratch in Control. Obviously, this might not be the sort of task a beginner would choose to do – it involves a little bit of soldering for a start. But, if it’s something you’ve always wanted to try out in a safe and encouraging environment; and possibly win a prize – then come and join us in Prague on May 18.

The One Hour Scratch Robot Challenge

One of the topics we’ll be doing a short case study on at Scratch in Control is the place of coding as a problem solving tool in Gifted and Talented provision. To summarise the approach we’ve used successfully: where appropriate, allow for a coded option to stretch G/T students. If you want to know more, either join us at our Scratch Day event in Prague, or buy us lunch

Today, we’ve had a G/T curriculum enrichment day for Junior High (KS3) students. Many of them already have some Scratch experience, but not so much familiarity with control technology. With only an hour, projects needed to be simple I decided that the best approach would be to offer three differentiated challenges.

Level 1: His Master’s Voice

I showed the group a script for a voice activated robot on the screen, by varying the loudness and timing of my commands, it (usually) performed as expected, spinning, jumping and dancing when ordered to. We discussed possible improvements and refinements that they could make if they were to take on this challenge.


Screenshot of a voice activated robot that responds to different commands (most of the time)

Level 2: Make Yourself a Cyborg

I then showed the group my simple Robot of Truth controller, connected to a Makey-Makey. We discussed different user-interfaces that they could draw with a 2B pencil. Some of them had existing projects that they wanted to enhance by making their own custom controllers.

The 2B pencil skeleton of the Robot of Truth – clips attach to the bottom (middle clip is GND/earth). When you touch the left/right hands, it completes the circuit for true/false questions. A Light Louse looks on, bemused by it all…

Level 3: Activate Skynet!

A Makey-Makey will let you easily make almost anything into a button for Scratch, but if you want more options involving both input and output , S4A with an Arduino make a great combination. I set up a simple breadboarded circuit including a light sensor and a DC motor; showing how just a few blocks of code would enable you to use the LDR as a simple proximity sensor to set off the motor. We discussed some possible projects, and I had a couple of students prototyping a contactless game controller and a Rube Goldberg burglar alarm.

An Arduino connected to a light sensor (via a resistor) and a DC motor (via a transistor). When the light sensor is put into shade, the motor starts…

In short, it was a very fruitful afternoon spent with two groups of creative and enthusiastic students.


Slide Potentiometers and Breakout Games

I like Arduinos – I tell my students that an arduino is a tiny ‘robot’ brain. Later on in the course I explaint to them that teachers lie all the time, because they can’t handle the truth…

Scratch for Arduino (S4A) is a variation of Scratch written to allow it to communicate directly with an Arduino board. Why would you want to do that? I hear you ask. Because you can tell Scratch to respond to a wider range of inputs than with a Picoboard or Makey-Makey. Plus, Scratch can then send instructions to servos, motors, LEDs and more to switch them on and off.

So, how long does it take to connect a slide potentiometer to S4A and write a simple Scratch Breakout game?

A slide potentiometer connected to an Arduino

It took me a few minutes to hook up a slide potentiomwter (cost – CZK37 – less than US$2) to an Arduino using some jumper wites and alligator clips I just happened to have lying about the place. The code took a couple of minutes – I wanted to do something reasonably straightforwards that a student could do using a little bit of trial and error.

Here’s the scripts.

The script for moving the paddle
The script for moving and bouncing the ball

And here’s a screenshot.

A screenshot of a very simple Breakout game – what would you do to improve it?

If you want to try this for yourself, and you’re free on May 18 in Prague – come and visit us at Scratch in Control


A Control Cylinder – Because I Can!

Another Makey-Makey project in our series of outrageous user interfaces.

A control cylinder – powered by a makey-makey

This one arose from some discussion in the wake of the ghost controller. I have a student who is thinking about what sort of user-interface you could build for exploring a 3D environment with a Makey-Makey.

You can see where this is going – tune in next week for the washing-up glove of power,,,

One of the possibilities we discussed was having an object to grip – like a baton. This could incorporate a glove, but I decided to have a go with recycling some packaging foam and a cylindrical tube more commonly used for holding stackable cruchy potato-based snacks…

I’ve taken several shots of the process, so I will put them together as a slideshow later. But the photo aboves should give a reasonable idea of how it’s put together. First I drew an outline of my hand on card to position where the buttons for each finger should go.

On this card, I used a 2B pencil to draw the circuit for my buttons – testing each location with a piece of card which had conductive tape attached to it. I then took another card, slightly thinner – and cut out holes to eexpose only the button areas. On the surface of this, I added the foam packaging to raise the card/conductive tape top half of the button above the graphite part.

As a mechanism, the buttons work reasonably well when everything is in place.

The card layers were then stuck round the outside of the cylinder and clipped to the makey-makey. A simple Scratch script was used to test the device.

Refinements

I think a redesign of the graphite side of the buttons could improve the responsiveness of the cylinder. Also, the layout for the buttons is for a hand resting on the cylinder. Next time, I shall design for the hand to be gripped round the baton.

It would be possible to add extra features. This one used four fingers for up/down/left/right and the thumb to emulate a mouse click. It would also be possible to add a tilt switch mechanism for the device.