The One Hour Scratch Robot Challenge

One of the topics we’ll be doing a short case study on at Scratch in Control is the place of coding as a problem solving tool in Gifted and Talented provision. To summarise the approach we’ve used successfully: where appropriate, allow for a coded option to stretch G/T students. If you want to know more, either join us at our Scratch Day event in Prague, or buy us lunch

Today, we’ve had a G/T curriculum enrichment day for Junior High (KS3) students. Many of them already have some Scratch experience, but not so much familiarity with control technology. With only an hour, projects needed to be simple I decided that the best approach would be to offer three differentiated challenges.

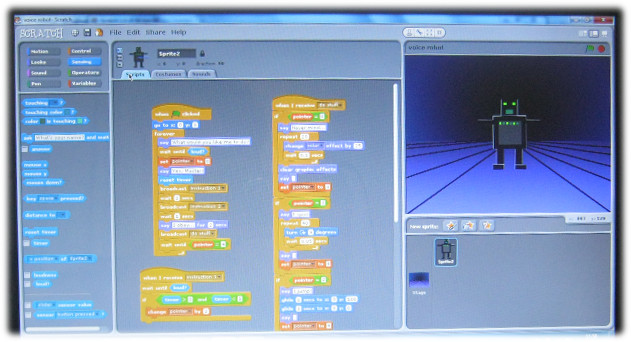
Level 1: His Master’s Voice

I showed the group a script for a voice activated robot on the screen, by varying the loudness and timing of my commands, it (usually) performed as expected, spinning, jumping and dancing when ordered to. We discussed possible improvements and refinements that they could make if they were to take on this challenge.


Screenshot of a voice activated robot that responds to different commands (most of the time)

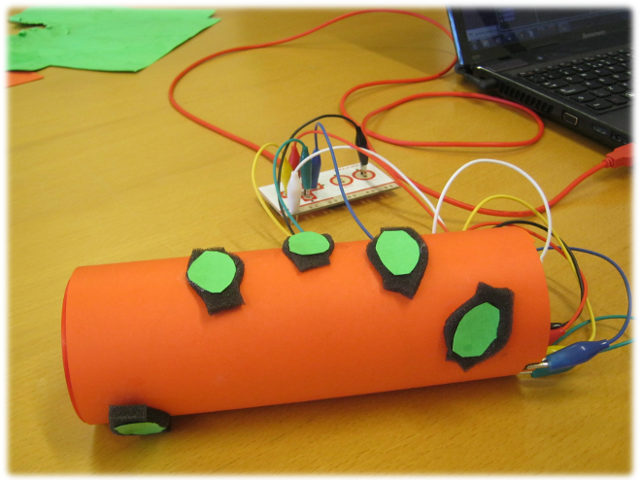
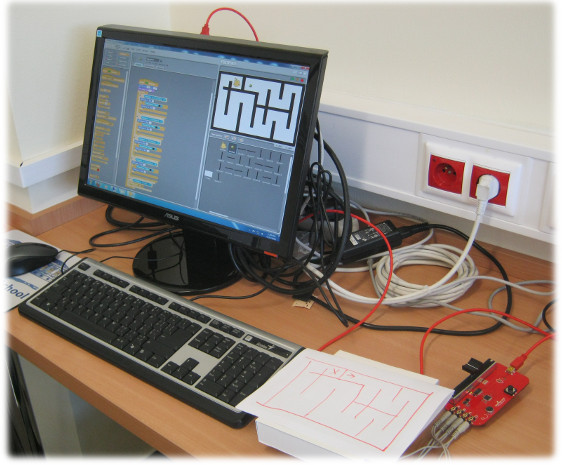
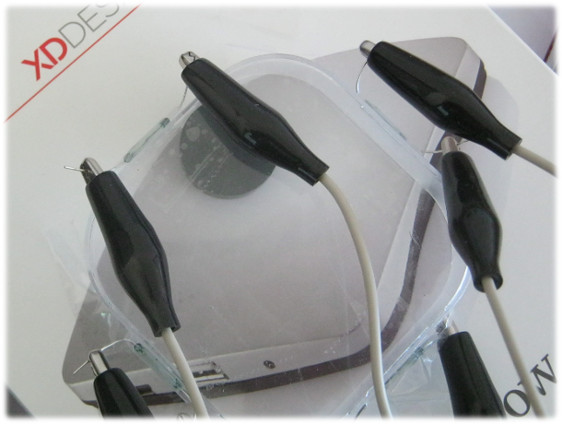
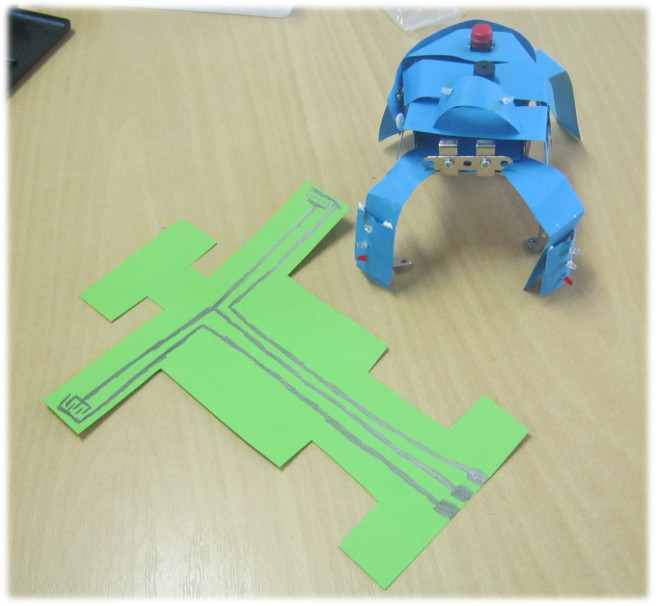
Level 2: Make Yourself a Cyborg

I then showed the group my simple Robot of Truth controller, connected to a Makey-Makey. We discussed different user-interfaces that they could draw with a 2B pencil. Some of them had existing projects that they wanted to enhance by making their own custom controllers.

The 2B pencil skeleton of the Robot of Truth – clips attach to the bottom (middle clip is GND/earth). When you touch the left/right hands, it completes the circuit for true/false questions. A Light Louse looks on, bemused by it all…

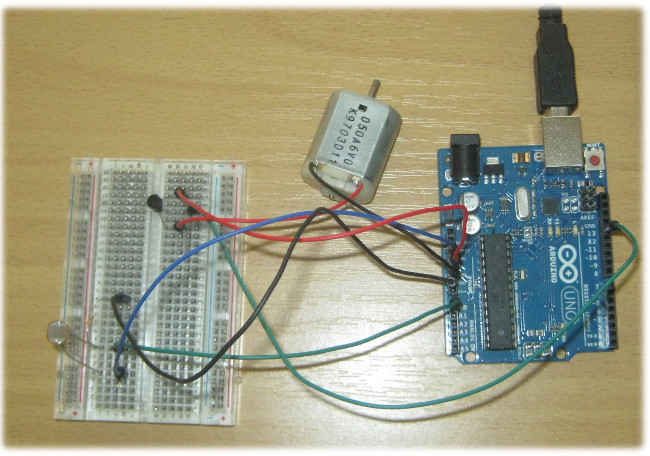
Level 3: Activate Skynet!

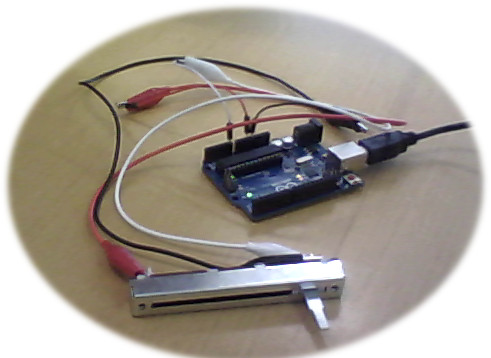
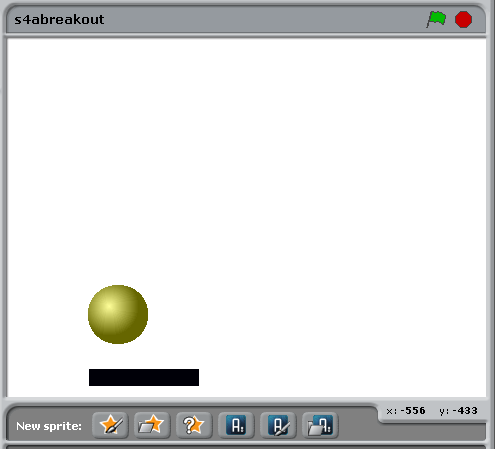
A Makey-Makey will let you easily make almost anything into a button for Scratch, but if you want more options involving both input and output , S4A with an Arduino make a great combination. I set up a simple breadboarded circuit including a light sensor and a DC motor; showing how just a few blocks of code would enable you to use the LDR as a simple proximity sensor to set off the motor. We discussed some possible projects, and I had a couple of students prototyping a contactless game controller and a Rube Goldberg burglar alarm.

An Arduino connected to a light sensor (via a resistor) and a DC motor (via a transistor). When the light sensor is put into shade, the motor starts…

In short, it was a very fruitful afternoon spent with two groups of creative and enthusiastic students.


Slide Potentiometers and Breakout Games

I like Arduinos – I tell my students that an arduino is a tiny ‘robot’ brain. Later on in the course I explaint to them that teachers lie all the time, because they can’t handle the truth…

Scratch for Arduino (S4A) is a variation of Scratch written to allow it to communicate directly with an Arduino board. Why would you want to do that? I hear you ask. Because you can tell Scratch to respond to a wider range of inputs than with a Picoboard or Makey-Makey. Plus, Scratch can then send instructions to servos, motors, LEDs and more to switch them on and off.

So, how long does it take to connect a slide potentiometer to S4A and write a simple Scratch Breakout game?

A slide potentiometer connected to an Arduino

It took me a few minutes to hook up a slide potentiomwter (cost – CZK37 – less than US$2) to an Arduino using some jumper wites and alligator clips I just happened to have lying about the place. The code took a couple of minutes – I wanted to do something reasonably straightforwards that a student could do using a little bit of trial and error.

Here’s the scripts.

The script for moving the paddle
The script for moving and bouncing the ball

And here’s a screenshot.

A screenshot of a very simple Breakout game – what would you do to improve it?

If you want to try this for yourself, and you’re free on May 18 in Prague – come and visit us at Scratch in Control


A Control Cylinder – Because I Can!

Another Makey-Makey project in our series of outrageous user interfaces.

A control cylinder – powered by a makey-makey

This one arose from some discussion in the wake of the ghost controller. I have a student who is thinking about what sort of user-interface you could build for exploring a 3D environment with a Makey-Makey.

You can see where this is going – tune in next week for the washing-up glove of power,,,

One of the possibilities we discussed was having an object to grip – like a baton. This could incorporate a glove, but I decided to have a go with recycling some packaging foam and a cylindrical tube more commonly used for holding stackable cruchy potato-based snacks…

I’ve taken several shots of the process, so I will put them together as a slideshow later. But the photo aboves should give a reasonable idea of how it’s put together. First I drew an outline of my hand on card to position where the buttons for each finger should go.

On this card, I used a 2B pencil to draw the circuit for my buttons – testing each location with a piece of card which had conductive tape attached to it. I then took another card, slightly thinner – and cut out holes to eexpose only the button areas. On the surface of this, I added the foam packaging to raise the card/conductive tape top half of the button above the graphite part.

As a mechanism, the buttons work reasonably well when everything is in place.

The card layers were then stuck round the outside of the cylinder and clipped to the makey-makey. A simple Scratch script was used to test the device.

Refinements

I think a redesign of the graphite side of the buttons could improve the responsiveness of the cylinder. Also, the layout for the buttons is for a hand resting on the cylinder. Next time, I shall design for the hand to be gripped round the baton.

It would be possible to add extra features. This one used four fingers for up/down/left/right and the thumb to emulate a mouse click. It would also be possible to add a tilt switch mechanism for the device.


The Ghost Controller – for Virtual Mazes…

Many years ago I coined the phrase ‘conceptual magpie’. Some people would argue that I’m not the first to think this way – depending on which online source you believe, either Dali or Picasso apparently said “Good artists copy, great artists steal.”

Like so many other teachers, I trawl forums, twitter feeds, blogs and books in search of that elusive holy grail – inspiration. The other day, I saw something that caught my imagination @joshburker embedded a video from https://t.co/Jyle5Z2KHp and I knew I’d have to introduce the Robo-Sharks to this when we next met.

We’ve done outrageous user-interfaces before:

  • A Red Nose Day Joy Balloon
  • The Joy Can – a liquid-filled 3D tilt switch
  • Computer-Moderated Board Games
  • Bottle-top Buttons

Come to Scratch in Control – our free one day training course for teachers in Prague on Scratch Day, May 18 2013 – and you’ll see some of these (and much more) in action. But rather than use a Makey-Makey, I decided to do this one with a Picoboard – just for fun.


ghost maze controller
Here is the entire setup – the maze script running on the computer, the maze taped to the top of the ghost controller and a Picoboard peeking out from under it.

There are loads of ways we could have tackled this – one of the Robo-Sharks suggested we could have just taped a JoyCan to the bottom of the maze controller. That’s what I like to see – build on an existing solution. But not this time. I wanted something that would be reasonably easy for other teachers to replicate in class. And, as another student had already pointed out; letting kids loose with cans that are half-full of water in close proximity to computers is tempting fate a little…

So, just to be different, I decided to use four reed switches (they call them jazýčkový spínač – tongue switches – here in the Czech Republic). They switch on/off if they are in close proximity to a magnet. I taped each of them to the outside of a thin plastic container, and put a magnet – the type you use to attach things to fridge dooor and whieboards – to roll around inside it.

reed switches
Here is the underside of the controller, you can see the reed switched, taped to the plastic container, plus the magnet used to turn them on/off as the controller is tilted. The clips are connected to the Picoboard

This was then taped to the bottom of a spare thin card box I just happened to have lying around, and a copy of the maze I’d drawn in Scratch variant BYOB was taped onto the top. No expense spared here – Heath Robinson, Rube Goldberg, you aint seen nothing…

The most difficult part of the whole exercise was ensuring that a downwards left tilt corresponded to a left roll of the ball on the screen and so on…

It was fun, reasonably cheap (4 reed switches cost about the equivalent of US$4 here) – the components can be easily re-used/recycled and the coding can be as simple/difficult as you want.

To extend it – a classier endgame sequence would be a start, A timer, a score including penalties for hitting the edges. I’d favour an ‘augmented reality’ style of approach – taking a photo on the maze controller and perhaps shifting it slightly when the controller is tilted.

My students wanted to add monsters to avoid…

Personally, I’d go for a curriculum-related option instead. Navigate the maze to collect three numbers that add up to 100 or which are all factors of 108. Make your way to the exit while spelling out a key vocabulary term by rolling the ball over specific letters placed in strategic points in the maze.


Happy Earth Day

For Earth Day today, we looked at binary trees with my IB Computer Science class.

We’re studying abstract data structures, so last week we used BYOB to create stacks and queues with new blocks for all the associated methods you would normally expect with each structure.

The BYOB tutorials cover trees, so I decided to start with with a presentation using Google slides, and a simple scratch implementation, using a set of lists to store the data structure. It would be possible to use a single list to store this data, but that would be less straight-forwards for someone to change.

Scratch Project

Then we went on to do tree traversals…

Enjoy!

Website Banners!

This week, I’ll be adding some banners to a few of my own websites to tell the visitors and users of some of my other resources about Scratch in Control.

Watch out for them. Here are a few examples:

Feel free to add them to your own website and link to here, the Indiegogo page or the Eventbrite page

A Shortcut and a QR Code

Ever since my students’ participation in BIMA D-Day, every time I’ve put together a site as an educational project that I’ll be presenting, I create a goo.gl shortcut.

The shortcut may be smaller, – good for adding to microblog posts but often isn’t simpler.

However, the goo.gl url shortener also creates a QR code. I joked with my class that adding this was to the blog pretty lame – why would someone reading the site need to see a QR code to get there.

Then the smartphones came out – a quick snap, and the blog was visible on their small screens

So, here’s the QR code for this site – I’ll be adding it to the ebooks and other resources too…

QR code for scratchincontrol.com

Our Pitch Video


In case you’re wondering, yes the pitch video for our Indiegogo campaign was done entirely in Scratch! I’ve uploaded the source code to the Scratch website.

Some technical notes:

The background music was provided by Stellardrone,  a very generous musician who releases all his work under a form of Creative Commons style attribution license.

The cog was first drawn in Scratch and then converted to a sprite. However, you will notice that I should have kept the cog and its shadow separate in order to achieve a more convincing 3D effect when animating them.

The presentation timings are co-ordinated by using five different broadcasts to mark the transitions between the different phases.

The video was recorded using Camstudio – free screen capture software, and then tidied-up and converted to a smaller wmv file using Windows Live Movie Maker.